Kubernetes is a prominent open-source orchestration platform. Individuals use it to deploy, manage, and scale applications. It is often challenging to manage stateful applications on this platform, especially those having heavy databases.
Ceph is a robust distributed storage system that comes to the rescue. This open-source storage platform is known for its reliability, performance, and scalability.
This blog post guides you on how to use Ceph persistent storage for Kubernetes with Cephfs. So let us learn the process step-by-step.
Before we jump into the steps, you must have an external Ceph cluster. We assume you have a Ceph storage cluster deployed with Ceph Deploy or manually.
Step 1: Deployment of Cephfs Provisioner on Kubernetes
Deployment of Cephfs Provisioner on Kubernetes is a straightforward process. Simply log into your Kubernetes cluster and make a manifest file to deploy the RBD provisioner. It is an external dynamic provisioner that is compatible with Kubernetes 1.5+.
vim cephfs-provisioner.ymlInclude the following content within the file. Remember, our deployment relies on RBAC (Role-Based Access Control). Therefore, we will establish the cluster role and bindings before making the service account and deploying the Cephs provisioner.
---
kind: Namespace
apiVersion: v1
metadata:
  name: cephfs

---
kind: ClusterRole
apiVersion: rbac.authorization.k8s.io/v1
metadata:
  name: cephfs-provisioner
  namespace: cephfs
rules:
  - apiGroups: [""]
    resources: ["persistentvolumes"]
    verbs: ["get", "list", "watch", "create", "delete"]
  - apiGroups: [""]
    resources: ["persistentvolumeclaims"]
    verbs: ["get", "list", "watch", "update"]
  - apiGroups: ["storage.k8s.io"]
    resources: ["storageclasses"]
    verbs: ["get", "list", "watch"]
  - apiGroups: [""]
    resources: ["events"]
    verbs: ["create", "update", "patch"]
  - apiGroups: [""]
    resources: ["services"]
    resourceNames: ["kube-dns","coredns"]
    verbs: ["list", "get"]
---
kind: ClusterRoleBinding
apiVersion: rbac.authorization.k8s.io/v1
metadata:
  name: cephfs-provisioner
  namespace: cephfs
subjects:
  - kind: ServiceAccount
    name: cephfs-provisioner
    namespace: cephfs
roleRef:
  kind: ClusterRole
  name: cephfs-provisioner
  apiGroup: rbac.authorization.k8s.io
---
apiVersion: rbac.authorization.k8s.io/v1
kind: Role
metadata:
  name: cephfs-provisioner
  namespace: cephfs
rules:
  - apiGroups: [""]
    resources: ["secrets"]
    verbs: ["create", "get", "delete"]
  - apiGroups: [""]
    resources: ["endpoints"]
    verbs: ["get", "list", "watch", "create", "update", "patch"]
---
apiVersion: rbac.authorization.k8s.io/v1
kind: RoleBinding
metadata:
  name: cephfs-provisioner
  namespace: cephfs
roleRef:
  apiGroup: rbac.authorization.k8s.io
  kind: Role
  name: cephfs-provisioner
subjects:
- kind: ServiceAccount
  name: cephfs-provisioner
---
apiVersion: v1
kind: ServiceAccount
metadata:
  name: cephfs-provisioner
  namespace: cephfs
---
apiVersion: apps/v1
kind: Deployment
metadata:
  name: cephfs-provisioner
  namespace: cephfs
spec:
  replicas: 1
  selector:
    matchLabels:
      app: cephfs-provisioner
  strategy:
    type: Recreate
  template:
    metadata:
      labels:
        app: cephfs-provisioner
    spec:
      containers:
      - name: cephfs-provisioner
        image: "quay.io/external_storage/cephfs-provisioner:latest"
        env:
        - name: PROVISIONER_NAME
          value: ceph.com/cephfs
        - name: PROVISIONER_SECRET_NAMESPACE
          value: cephfs
        command:
        - "/usr/local/bin/cephfs-provisioner"
        args:
        - "-id=cephfs-provisioner-1"
      serviceAccount: cephfs-provisioner
Next, apply the manifest.
$ kubectl apply -f cephfs-provisioner.yml
namespace/cephfs created
clusterrole.rbac.authorization.k8s.io/cephfs-provisioner created
clusterrolebinding.rbac.authorization.k8s.io/cephfs-provisioner created
role.rbac.authorization.k8s.io/cephfs-provisioner created
rolebinding.rbac.authorization.k8s.io/cephfs-provisioner created
serviceaccount/cephfs-provisioner created
deployment.apps/cephfs-provisioner created
Make sure that the Cephfs volume provisioner pod is in the operational state.
$ kubectl get pods -l app=cephfs-provisioner -n cephfs
NAME                                  READY   STATUS    RESTARTS   AGE
cephfs-provisioner-7b77478cb8-7nnxs   1/1     Running   0          84s
Step 2: Obtain the Ceph Admin Key and Create a Secret on Kubernetes
Access your Ceph cluster and retrieve the admin key to be used by the RBD provisioner.
sudo ceph auth get-key client.adminSave the value of the admin user key displayed by the above command. Later, we will incorporate this key as a secret in Kubernetes.
kubectl create secret generic ceph-admin-secret \
    --from-literal=key='<key-value>' \
    --namespace=cephfs
Where <key-value> is your Ceph admin key. Verify the creation by using the following command.
$ kubectl get secrets ceph-admin-secret -n cephfs
NAME                TYPE     DATA   AGE
ceph-admin-secret   Opaque   1      6s
Step 3: Make Ceph Pools for Kubernetes and Client Key
To run a Ceph file system, you will need at least two RADOS pools, one for data and another for metadata. Usually, the metadata pool contains only a few gigabytes of data.
Generally, individuals use 64 or 128 for large clusters. Therefore, we recommend a small PG count.
Now let us make Ceph OSD pools for Kubernetes:
sudo ceph osd pool create cephfs_data 128 128
sudo ceph osd pool create cephfs_metadata 64 64
Create a Ceph file system on the pools.
sudo ceph fs new cephfs cephfs_metadata cephfs_dataConfirm Ceph File System Creation.
$ sudo ceph fs ls
 name: cephfs, metadata pool: cephfs_metadata, data pools: [cephfs_data ]
UI Dashboard Confirmation
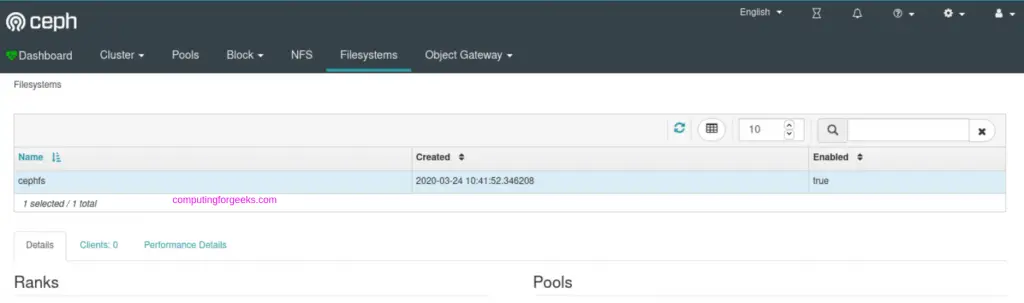
Step 4: Make Cephfs Storage Class on Kubernetes
A StorageClass serves as a means to define the “classes” of storage you offer in Kubernetes. Let’s create a storage class known as “Cephrfs.”
vim cephfs-sc.ymlAdd the following content to the file:
---
kind: StorageClass
apiVersion: storage.k8s.io/v1
metadata:
  name: cephfs
  namespace: cephfs
provisioner: ceph.com/cephfs
parameters:
    monitors: 10.10.10.11:6789,10.10.10.12:6789,10.10.10.13:6789
    adminId: admin
    adminSecretName: ceph-admin-secret
    adminSecretNamespace: cephfs
    claimRoot: /pvc-volumes
Where:
⦁ Cephfs is the name of the StorageClass to be created.
⦁ 10.10.10.11, 10.10.10.12 & 10.10.10.13 are the IP addresses of Ceph Monitors. You can list them with the command:
$ sudo ceph -s
  cluster:
    id:     7795990b-7c8c-43f4-b648-d284ef2a0aba
    health: HEALTH_OK

  services:
    mon: 3 daemons, quorum cephmon01,cephmon02,cephmon03 (age 32h)
    mgr: cephmon01(active, since 30h), standbys: cephmon02
    mds: cephfs:1 {0=cephmon01=up:active} 1 up:standby
    osd: 9 osds: 9 up (since 32h), 9 in (since 32h)
    rgw: 3 daemons active (cephmon01, cephmon02, cephmon03)

  data:
    pools:   8 pools, 618 pgs
    objects: 250 objects, 76 KiB
    usage:   9.6 GiB used, 2.6 TiB / 2.6 TiB avail
    pgs:     618 active+clean
Once you have updated the file with the accurate value of Ceph monitors, give the Kubectl command to make the StorageClass.
$ kubectl apply -f cephfs-sc.yml
storageclass.storage.k8s.io/cephfs created
Next, list all the available storage classes:
$ kubectl get sc
NAME       PROVISIONER       RECLAIMPOLICY   VOLUMEBINDINGMODE   ALLOWVOLUMEEXPANSION   AGE
ceph-rbd   ceph.com/rbd      Delete          Immediate           false                  25h
cephfs     ceph.com/cephfs   Delete          Immediate           false                  2m23s
Step 5: Do Testing and Create Pod
Create a test persistent volume claim to ensure that everything is smooth.
$ vim cephfs-claim.yml
---
kind: PersistentVolumeClaim
apiVersion: v1
metadata:
  name: cephfs-claim1
spec:
  accessModes:
    - ReadWriteOnce
  storageClassName: cephfs
  resources:
    requests:
      storage: 1Gi
Apply manifest file
$ kubectl  apply -f cephfs-claim.yml
persistentvolumeclaim/cephfs-claim1 created
The successful binding will show the bound status.
$ kubectl get pvc
NAME              STATUS   VOLUME                                     CAPACITY   ACCESS MODES   STORAGECLASS   AGE
ceph-rbd-claim1   Bound    pvc-c6f4399d-43cf-4fc1-ba14-cc22f5c85304   1Gi        RWO            ceph-rbd       25h
cephfs-claim1     Bound    pvc-1bfa81b6-2c0b-47fa-9656-92dc52f69c52   1Gi        RWO            cephfs         87s
Next, we can launch a test pod using the claim we made. First, create a file to store that data:
vim cephfs-test-pod.yamlAdd content below:
kind: Pod
apiVersion: v1
metadata:
  name: test-pod
spec:
  containers:
  - name: test-pod
    image: gcr.io/google_containers/busybox:latest
    command:
      - "/bin/sh"
    args:
      - "-c"
      - "touch /mnt/SUCCESS && exit 0 || exit 1"
    volumeMounts:
      - name: pvc
        mountPath: "/mnt"
  restartPolicy: "Never"
  volumes:
    - name: pvc
      persistentVolumeClaim:
        claimName: claim1
Create Pod:
$ kubectl apply -f cephfs-test-pod.yaml
pod/test-pod created
Make sure the pod is in the running state:
Congratulations! Now you can enjoy Cephfs for persistent volume provisioning on Kubernetes.
Advantages of Ceph Persistent Storage for Kubernetes with Cephfs
The Ceph persistent storage for Kubernetes with Cephfs offers several benefits. Some major ones include:
Scalability
Ceph supports seamless storage scaling, thanks to its distributed nature. As a result, it meets the growing needs of Kubernetes applications. Ceph can smoothly accommodate the increasing workload of applications.
High Uptime
CephFS is known for its high availability. Since it replicates data across multiple nodes, users do not notice downtown.
Flexibility
CephFs is adaptable to diverse application requirements. The deployment of Kubernetes involves the use of different data types. CephFS provides support for both file and block storage.
Snapshot & Cloning
You do not need to worry about data management and recovery with Cephfs. Its cloning and snapshot capabilities make it a perfect storage system for data-centric applications.
Final Words
The implementation of Ceph persistent storage with Kubernetes needs expertise in both technologies. It is advisable to manage Ceph clusters and integrate them with Kubernetes carefully. We hope the guide helps you with the smooth integration.