No one can deny the significance of CI (Continuous Integration) and CD (Continuous Deployment) in software development. They enable a coder to integrate and deploy software codes and identify possible issues simultaneously.
Consequently, the process naturally saves the time and effort of a developer.
While several platforms support CI/CD, GitLab has grown in popularity. It automates software development in several aspects.
This guide makes you aware of the features of GitLab CI/CD. In addition, you will learn to build CI/CD pipelines on GitLab.
So let us get started.
What is GitLab CI/CD?
CI stands for Continuous Integration, while CD for Continuous Deployment/Delivery.
CI supports the continuous integration of code changes from various contributors into a shared repository. On the other hand, CD allows code deployment while being developed.
GitLab CI/CD is a set of tools and techniques automating software development. It enables users to create, test and deploy code changes inside the GitLab to the end users.
The platform aims to support consistent workflow and improve the speed and quality of code.
Features of GitLab CI/CD
GitLab has several benefits over conventional software development methods.
Some key benefits are as per below:
⦁ GitLab keeps CI/CD and code management in the same place.
⦁ It’s a cloud-hosted platform. You do not need to worry about setting up and managing databases or servers.
⦁ You can sign up for the subscription plan that suits your budget.
⦁ You can run different types of tests, such as unit tests, integration tests, or end-to-end tests.
⦁ GitLab automatically builds and tests your code changes as they are pushed to the repository.
⦁ Since GitLab CI/CD is built-in, there is no need for plugin installation.
⦁ The platform supports continuous code collaboration and version control.
The Architecture of GitLab CI/CD
GitLab CI/CD architecture consists of the following components:
GitLab Server
Like every online platform, GitLab works on a server.
The GitLab server is accountable for hosting all your Git repositories. It helps you keep your data on the server for your client and team.
The GitLab server hosts your applications and configures the pipeline. It also manages the pipeline execution and assigns jobs to the runners available.
GitLab.com is run by a GitLab instance that further comprises an application server, database, file storage, background workers, etc.
Runners
Runners are applications that run CI/CD pipelines. GitLab has several runners configured. Every user can access these runners on gitlab.com. Users are allowed to set up their own GitLab runners.
Jobs
Jobs are tasks performed by the GitLab pipeline. Each job has a unique name and script. Each script gets finished one after the other. A user moves on to the next one only when the previous one is complete.
Stages
Stages are referred to the differences between jobs. They ensure the completion of jobs in the pipeline. For instance, testing, building, and deploying.
Pipeline
The pipeline is a complete set of stages. Every stage comprises single or multiple jobs.
You can find various types of pipelines in GitLab. These types include basic pipelines, multi-branch pipelines, merge request pipelines, parent-child pipelines, scheduled pipelines, multi-job pipelines, etc.
Commit
Commit is a record of changes made in the code or files. It is similar to what we see in a GitHub repository.
So this is an architecture of GitLab CI/CD. Let us learn how to build a simple CI/CD pipeline with GitLab.
Building a Simple CI/CD pipeline for a Python Application
1. First, create an account on GitLab.
2. Next, create a new project.
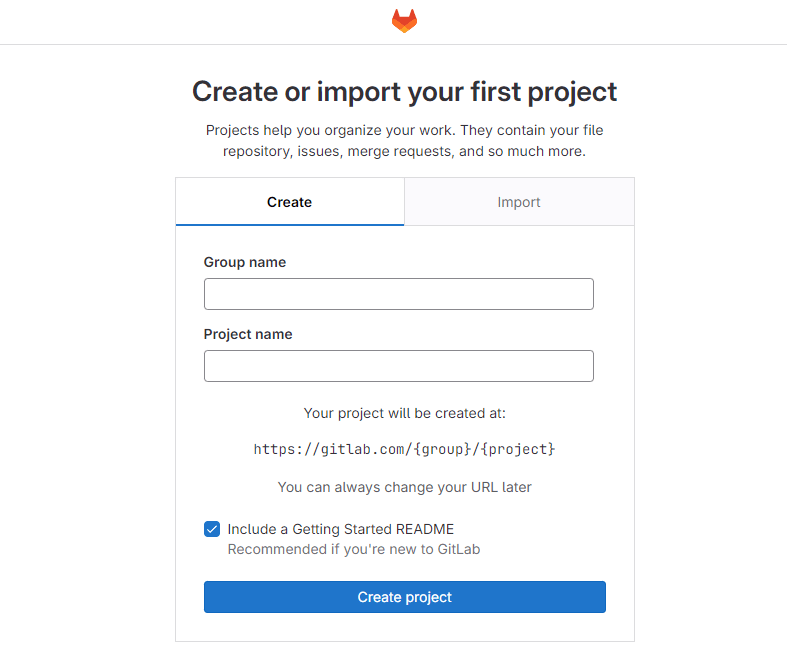
You get four different options to create your project. Choose any method convenient to you.
In this example, we will import the project from GitHub.
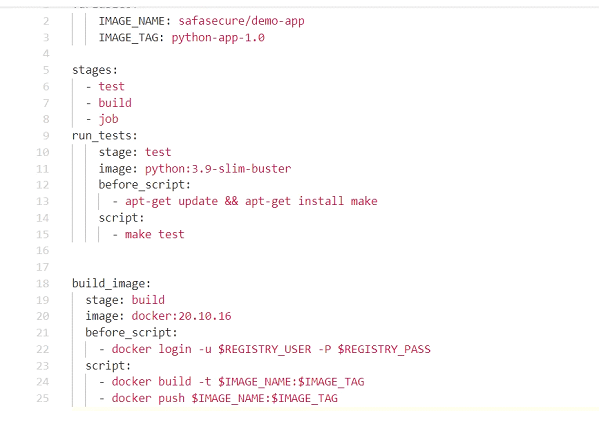
3. Once the project is set up, create a yaml file. Give it a name that is easy to remember. For example, .gitlab-ci.yml.
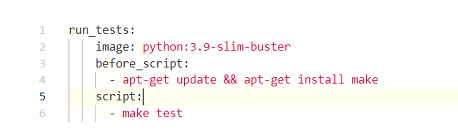
Above is an example of tests run.
Image: It is the image we intend to use to execute our script.
before_script: Before script helps you install the prerequisites required to run your scripts. It also includes commands you need to run before the script command.
after_script: This script outlines commands running after each job. It may also include failed jobs handling.
To add the Python image, we are using images available on DockerHub.

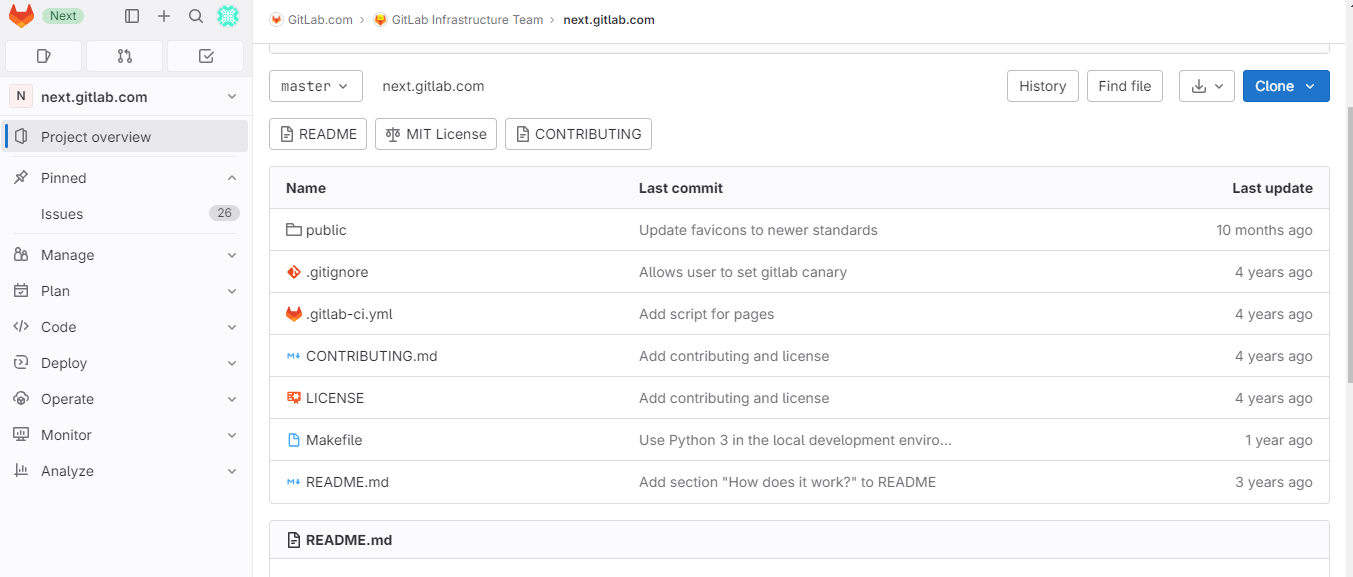
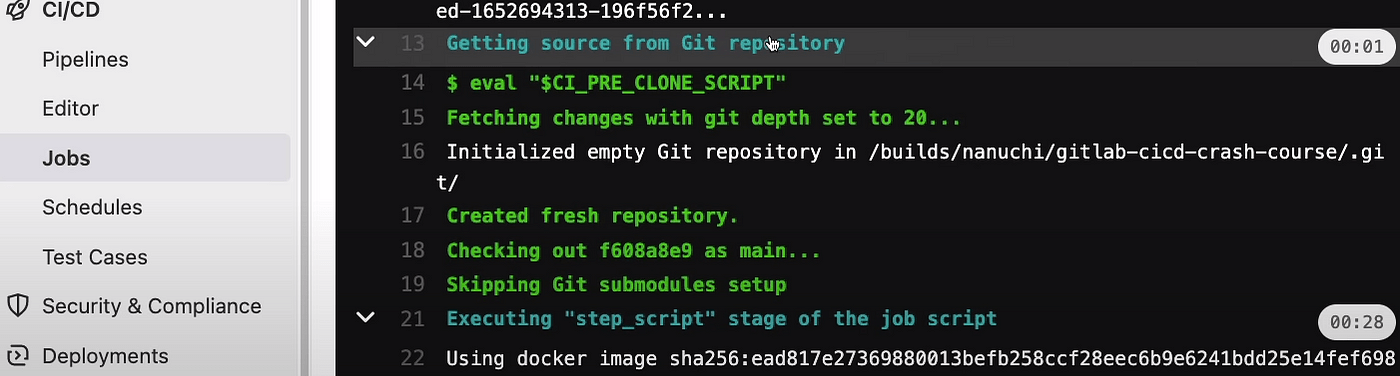
4. Under the CI/CD tab, you will find the ‘Jobs’ tab to get detailed logs and troubleshooting.
5. Next, create an account on DockerHub. You can find the image for Docker on Dockerhub.
6. Go back to the yaml script and write a script to upload the docker image to the repository. You will need to use credentials. To ensure the safety of credentials, use another GitLab feature.
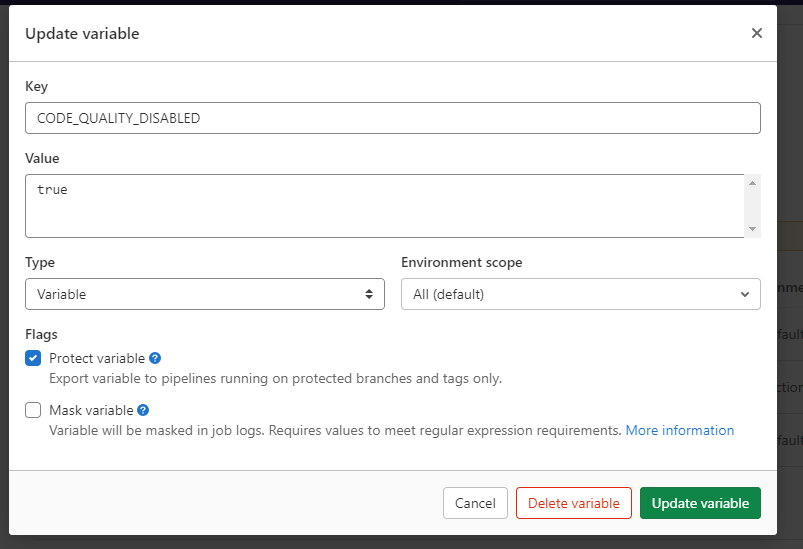
Go to Settings-> CI/CD-> Variables
Here you can make global variables that you can refer to in the code. If you use the masked variable option, it will prevent the visibility of variable content in logs.
7 Next, upload the image to a private repository. Tag the repository name in Dockerhub. It will help you when writing the Docker push command.
The stage clause guarantees that each stage will execute one after another.
You can create variables both globally and inside the jobs. You can use them as:
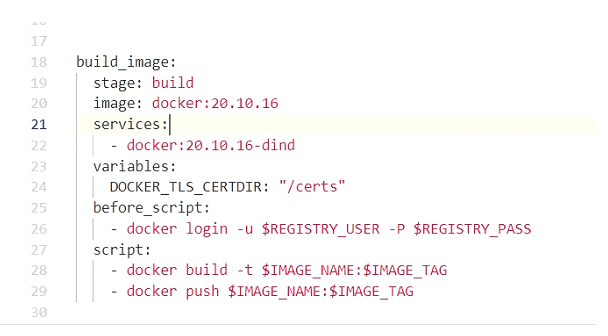
$var18. In our example, we are following docker in the docker concept. It means we have to make docker available inside its container. The docker client and daemon are inside the container to execute the docker command.
9. Now it is time for the preparation of the deployment server. The process involves configuring the tools and settings to automate the deployment. You can use any remote server.
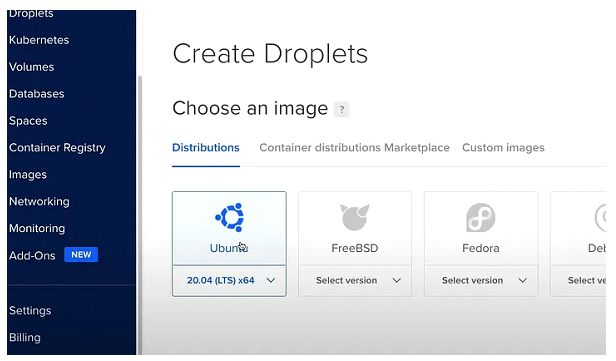
In this example, we are using an Ubuntu server.
10. We used the following command to create a private key.
ssh-keygenThe method to create a private variable is the same as mentioned in step 6.
11. Next, add the yaml script.
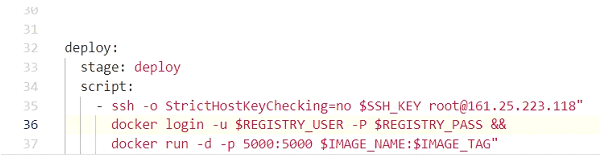
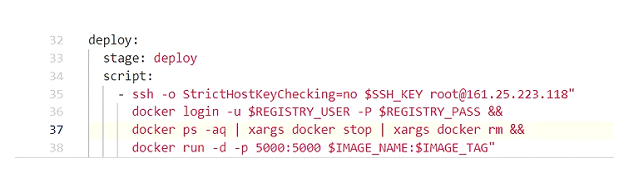
Before using the docker run command, stop existing containers. Especially those running on the same port. For this, we have added line 37.
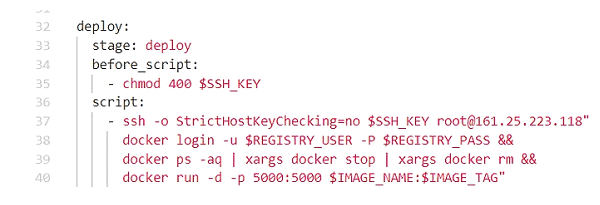
By default, key permissions are open to everyone. Therefore, when we connect with a private key, it shows the insecurity error. Add the line 35 – chmod 400 to prevent its public accessibility.
This is how you can configure the pipeline on GitLab for your project.
Conclusion
GitLab CI/CD is an ideal platform for developers to practice their software development processes. The good thing is that the entire team can collaborate.
In this guide, we learned the fundamental concepts of GitLab CI/CD. In addition, we built a straightforward CI/CD pipeline for a Python application.
All-in-all, we can say that GitLab is an excellent set of tools helping developers take an all-inclusive approach to delivering software and web applications.