It’s no surprise that the front-office adds value to your web project but the back-office is no exception. An admin dashboard streamlines your CRUD operations ensuring efficiency and productivity.
However, building a professional admin dashboard can be time-consuming unless you have a feature-rich tool. That’s where AdminJS kicks in reducing the time and effort to build an administration web app for your business.
Whether you have a space for lead management or customer support, AdminJS can help you build a custom admin dashboard to your needs. In this guide, we have crafted an easy step-by-step process to build a custom admin interface using AdminJS.
So, let’s make this count!
AdminJS Explained: What Makes it Worth Using?
AdminJS is a robust and versatile open-source framework designed to simplify the development of custom admin interfaces for web applications. It provides developers with a comprehensive set of tools and features to create intuitive and user-friendly admin dashboards.
AdminJS is backend-agnostic, meaning it can be integrated with various backend frameworks and libraries. It supports popular backend technologies such as Node.js, Ruby on Rails, and others. This flexibility enables developers to choose their preferred backend technology and seamlessly integrate AdminJS into their existing stack.
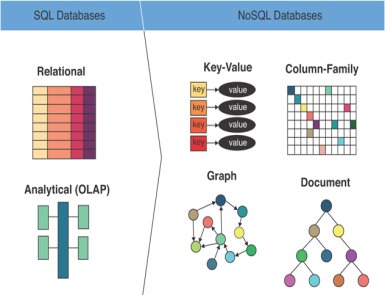
The tool supports multiple databases, including MongoDB, PostgreSQL, MySQL, and others, through dedicated adapters. These adapters simplify the process of connecting AdminJS to the chosen database, allowing developers to manage data effectively within the admin dashboard.
It supports various authentication providers, such as email/password, OAuth, and JWT (JSON Web Tokens), making it easy to implement secure login mechanisms. Additionally, AdminJS allows developers to define granular access control rules, ensuring that the right permissions are assigned to each user.
Building a Custom Admin Dashboard Interface Using Admin JS
Set up AdminJS
The first and foremost step to use AdminJS is to install the tool with the Express plugin and Prisma adapter. Use the below command to run the installation:
yarn add adminjs @adminjs/express @adminjs/prisma
Before you start coding, add TypeScript and Express Types as dev dependencies. Here’s how you can do it:
yarn add -D @types/express ts-nodeOnce you have installed the AdminJS, it’s time to initialize the panel with the app.ts file in the root directory. To initialize,
import AdminJS from 'adminjs'
import AdminJSExpress from '@adminjs/express'
import express from 'express'

const PORT = 3000

const start = async () => {
  const app = express()
  const admin = new AdminJS({})
  const adminRouter = AdminJSExpress.buildRouter(admin)
  app.use(admin.options.rootPath, adminRouter)
  app.listen(PORT, () => {
    console.log(`AdminJS started on http://localhost:${PORT}${admin.options.rootPath}`)
  })
}
start()
Connect Database
Admin JS supports various databases, and connecting to your preferred database is straightforward. For example, if you’re using MongoDB, install the MongoDB adapter by running the following command:
npm install adminjs-mongooseNext, create a new file, `admin.js`, and add the following code to set up the database connection:
const AdminJS = require('adminjs');
const MongooseAdapter = require('adminjs-mongoose');

const mongoose = require('mongoose');
const connection = mongoose.createConnection('mongodb://localhost/my-database');

AdminJS.registerAdapter(MongooseAdapter);

const admin = new AdminJS({
  databases: [connection],
  rootPath: '/admin',
});

module.exports = admin;
Add Authentication
Securing your admin dashboard with authentication is essential. Admin JS provides built-in authentication features that can be easily integrated into your application. Let’s see an example of setting up authentication using Passport.js:
const AdminJS = require('adminjs');
const { Authentication } = require('adminjs-passport');

const express = require('express');
const app = express();

AdminJS.registerAdapter(MongooseAdapter);

const admin = new AdminJS({
  databases: [connection],
  rootPath: '/admin',
  auth: {
    authenticate: async (email, password) => {
      const user = await User.findOne({ email });
      if (user && await user.validPassword(password)) {
        return user;
      }
      return null;
    },
    cookieName: 'adminjs',
    cookiePassword: 'supersecret',
  },
});

app.use(admin.options.rootPath, admin.router);

app.listen(3000, () => console.log('Admin JS is running on http://localhost:3000/admin'));
Override AdminJS Logo
By default, Admin JS displays its logo on the admin dashboard. However, you can easily replace it with your custom logo. Add the following CSS snippet to your project’s CSS file:
.ab-logo img {
  content: url('/path/to/your/logo.png');
}
Make sure to replace `/path/to/your/logo.png` with the path to your actual logo file.
Customize Admin Dashboard with React component
Admin JS provides a React component called `AdminJS.bundle.js` that allows you to customize the admin dashboard further. Import this component into your React application and use it to render the admin dashboard:
import React from 'react';
import { render } from 'react-dom';
import { AdminJS } from 'adminjs';

const App = () => {
  return (
    <AdminJS />
  );
};

render(<App />, document.getElementById('root'));
Deploy the Dashboard
Once you have built your custom admin dashboard using Admin JS, you can deploy it to your preferred hosting provider. You can use platforms like Heroku, AWS, or Netlify to host your application. Make sure to follow the deployment instructions specific to your chosen hosting provider.
Conclusion:
AdminJS is an excellent choice for building custom admin dashboards with ease. Its user-friendly interface, customization options, database support, authentication mechanisms, and extensibility make it a powerful full-stack development partner.
By following the steps outlined in this guide, you can create a fully functional and customized admin dashboard using AdminJS. So, leverage the capabilities of AdminJS and streamline your admin dashboard development process today!


