
Sync Engines: Their Role in Modern Web Application Development

The landscape of web applications is constantly evolving. Users nowadays expect web apps to be responsive, well-synchronized, and capable of delivering real-time experiences. Unfortunately, most traditional client-server models struggle to keep up with these expectations. This is where sync engines step in. The sync engine is an advanced technology that helps solve many common problems app developers face today. Let us break down what sync engines are and how they help. Overview of Sync Engines Sync engines synchronize data between multiple services, apps, and devices. These systems keep data consistent and up-to-date across different systems, clients, or devices. A sync engine monitors data changes and propagates them properly throughout an application. The engine enables real-time data synchronization and supports offline user collaboration. The good thing is that all these functions are almost invisible to end users. Sync engines allow developers to edit documents on one device and see those changes on another without manual intervention. It can greatly benefit developers building collaborative web apps, real-time dashboards, and offline-first applications. Popular apps like Figma, Notion, Trello, and Linear all use sync engines to keep data in sync across devices. Let us take a closer look at the functionality of sync engines. How Does a Sync Engine Work? The sync engine relies on multiple systems to achieve data synchronization. It maintains a local copy of the data and updates the remote server whenever changes occur. The engine stores data locally, allowing users to interact with it even when offline. As users modify data, the sync engine detects these changes automatically. If modification happens on multiple clients, the engine applies a conflict resolution mechanism to manage these changes. The sync engine synchronizes changes with remote servers to ensure all clients receive up-to-date information. In short, the job of a sync engine is to manage three essential tasks. These include: Detection of Changes: The sync engine detects when and where data changes occur—whether on the server, in the cloud, or on a local client. Transmission of Data: The engine transmits these changes to all other related devices and systems. Conflict Resolution: If data is being changed in various places, the engine will resolve these conflicts depending on predefined rules or user inputs. Components of Sync Engines A powerful sync engine comprises several key components. Below are the main components and their respective functions. Change tracker tracks changes made to local data since the last sync. It uses version numbers, timestamps, and logs to do this. The local store saves app data on the device using technologies like IndexedDB or SQLite. Conflict resolver handles situations where the same data is changed in two places, preventing crucial updates from being overwritten. Sync protocol defines the rules and format for data exchange between servers and devices. The network layer handles communication between clients and servers securely. Data serializer converts data into a compact, transferable format to ensure proper synchronization. Advantages of Sync Engines Real-time Collaboration: Sync engines allow multiple users to work on the same document or spreadsheet simultaneously. All participants can view changes in real-time. Offline Functionality: The engine supports offline functionality, allowing users to continue working without an internet connection. Once they’re back online, all changes automatically sync and merge without any extra effort. Enhanced User Experience: The engine minimizes data friction by ensuring seamless synchronization. Moreover, it assures users that their data is safe, up-to-date, and accessible at all times. Excellent Performance: Since sync engines work on local-first architectures, they offer better performance than traditional servers. All operations happen instantly on the local device. This approach minimizes reliance on round-trip server communication, resulting in lower latency. Minimum Backend Complexity: A sync engine lets you decouple the backend and front end using synchronization protocols. Additionally, it can also offload data tracking and versioning logic. This approach supports decentralized architectures, improving scalability and maintainability. Support for Complex Data Structures: Sync engines can handle complex objects, such as nested lists & trees, graphs, and hierarchical content. These engines employ smart encoding and reconciliation technology to preserve structure and relationships within data. Highly Scalable: Sync engines can handle multiple operations locally, reducing the load on central servers. They are ideal for web apps with millions of users or that require frequent concurrent edits. Final Words Sync engines have become a key part of modern web app infrastructure. Features like real-time collaboration, cross-device continuity, and offline functionality make sync engines a powerful asset for modern web applications. Consider integrating a sync engine if you want to build a modern app. It will improve your workflow and efficiency.
WebLLM: Bring AI Language Models to Your Browser

Over the past few years, artificial intelligence has transformed our lives significantly. Today, many people rely on AI tools to solve their problems. Tools like DeepSeek, ChatGPT, and Gemini assist users in various ways. The good news is that you can now use AI models directly in your browser without relying on the cloud. WebLLM is an in-browser LLM inference engine that makes this possible. Let us learn more about this platform. Overview of WebLLM WebLLM is an open-source, in-browser LLM inference engine developed by the MLC-AI team. It was first released in December 2024. The platform runs LLMs (Large Language Models) directly in the browser using WebGPU. You do not need to use cloud-based APIs anymore. Since WebLLM runs the model directly on your device, it eliminates the need for server-side computation, resulting in faster responses and enhanced privacy. How does WebLLM work? WebLLM is powered by the WebGPU API, a modern graphics interface designed for the web. It helps WebLLM execute complex tensor operations required for running LLMs. WebGPU API can perform deep learning computations and matrix multiplications. WebLLM loads quantized versions of language models, optimized to reduce model size and computational demands. These models are pre-trained and converted into formats compatible with in-browser execution. Quantization reduces numerical precision, which ensures low memory usage. This makes the model small enough to load and run directly in a browser. Once loaded, WebLLM runs the model entirely within the browser using WebGPU. The model processes inputs and generates outputs locally, delivering near-instant responses. WebLLM is built on MLC-LLM, a framework that compiles and optimizes AI models for efficient execution straight in web browsers. Some official supported models by WebLLM include: Llama 3 (Meta AI) Mistral (Open-weight LLM) StableLM (Stability AI) Gemma (Google’s Lightweight LLM) Key Features of WebLLM Cross-Platform Compatibility: WebLLM runs on both desktop and mobile devices. It supports almost all modern browsers, including Google Chrome and Microsoft Edge. Additionally, users can use it on several operating systems, such as Windows, macOS, and Linux. You do not need to install any additional software. No Internet Required: Once the language model is downloaded and loaded into the browser, WebLLM runs it entirely offline. People can use the model without depending on cloud services, even with limited or no internet connectivity. The offline service is just as secure and fast. WebLLM handles all computations locally, with no network delays or external dependencies. Exceptional Privacy: Since WebLLM processes data locally within the browser, there is no fear of information leakage. Your conversations and inputs remain confidential, as no remote server is involved. The platform is ideal for individuals who value privacy and are concerned about data breaches. Open Source Platform: WebLLM is an open-source architecture. Users can seamlessly integrate it into their projects. It lets users inspect the code and make modifications as per the requirements. Furthermore, open-source licensing also encourages transparency and community collaboration. Excellent Performance: Although WebLLM runs in a browser environment, it still delivers decent performance. It can generate 15 to 20 tokens per second. This AI engine also offers ultra-low latency for real-time interaction. WebLLM uses aggressive quantization, reducing 32-bit weights to 8-bit or less. This significantly lowers memory bandwidth requirements. Pros and Cons of WebLLM Like every technology, WebLLM has some strengths and limitations. Advantages WebLLM enhances privacy by running AI models directly in your browser, with no data sent to external servers. The platform runs directly in your browser—no extra software needed. It processes results in real time, so there is no noticeable latency. WebLLM is ideal for users who want to deliver AI experiences without maintaining backend servers. As an open-source platform, it gives developers access to its codebase. Users can stream AI model responses in real-time. WebLLM helps save money by eliminating the need for costly API calls and inference servers. Disadvantages The initial loading time is a bit higher, especially on slower devices. WebLLM relies on WebGPU, which may not be supported in some browsers. Future of WebLLM? The future of WebLLM is promising. Its adoption is steadily growing, thanks to key features like strong privacy and offline capabilities. As browsers and devices continue to improve, we can expect even faster and more efficient in-browser AI experiences.WebLLM can be used to build various applications, such as writing tools, chat assistants, and educational apps. Final Words WebLLM is revolutionizing AI development. It has unlocked new opportunities in building AI-powered web applications. It makes running large language models in the browser easier by supporting chat completions and streaming. If you want to run an AI language model right in your browser without sacrificing privacy, WebLLM is worth a try.
Kestra: Everything You Need to Know About It
Today, data serves as the foundational pillar across nearly all industries. However, optimizing data and managing its flow are always significant challenges. Kestra is a powerful tool that enables businesses to run and monitor data flows easily. The platform is gaining attention from developers worldwide. Let us explore what makes Kestra unique. This post dives into its architecture, features, and real-world use cases. Overview of Kestra Kestra is an open-source workflow orchestration tool. It helps building and automating workflows across all modern infrastructures. Kestra was first released on February 1, 2022. Ludovic Dehone, the CTO of Kestra, initiated this project in 2019. Written in Java, the platform lets users create, schedule, and monitor complex tasks and processes. It features a YAML-based syntax, making it user-friendly for beginners. In addition, Kestra supports integration with various APIs, data systems, and cloud services. It is known for managing complex data workflows and building pipelines in a few minutes. Let us take a closer look at the architecture of this platform. Architecture of Kestra Kestra has a cloud-native architecture that makes it a comprehensive tool. Some of its primary components include: Executor: It is the heart of Kestra’s runtime environment. The executor launches the schedule of workflows. It also monitors the state of running workflows. If any task fails, the executor restarts it. Kestra reacts instantly to any fluctuation in the task due to its event-driven architecture. Scheduler: The scheduler organizes the workflows using CRON or event-based triggers. It determines when workflows should run and assigns execution to the executor services. UI & API: It includes an easy-to-use web interface to manage workflows, system health, and logs. Kestra features a REST API. This graphical user interface allows users to design, monitor, and troubleshoot workflows without writing any code. Storage & Persistence: Kestra stores workflow definitions, execution logs, and metadata in a centralized database. The database ensures high uptime and provides quick recovery support. Plugins: Kestra features a robust plugin system that enables integration with third-party services such as AWS, Azure, and Git. It provides support for 200+ plugins. Queue: This component is responsible for managing communication between components. Kestra features pluggable queue systems. Features of Kestra Kestra offers a rich set of powerful features that set it apart from other workflow orchestrators. Some of its most noteworthy features include: Community Support: Kestra is an open-source orchestrator with a growing community. Numberless users contribute to its development and share their experiences. The platform offers many resources to its users, including a contributor guide and a plugin development guide. It also has an FAQ section that addresses common questions. Simplicity: Kestra allows you to define workflows as YAML files. Unlike other orchestrators, Kestra takes an intuitive and readable approach that reduces the complexity of developing and maintaining pipelines. As Kestra is a language-agnostic platform, developers can write tasks in various languages, such as Python, Javascript, Java, and more. Developer-Friendly UI: Kestra has an intuitive and accessible user interface. It features an easy-to-navigate dashboard, allowing developers to debug errors, edit workflows, and rerun them without switching tabs. Developers get real-time insights into tasks execution, detailed logs, and other metrics. These features enable faster debugging and enhance developer productivity. Easy Setup and Configuration: Kestra supports straightforward configuration. Users can easily access it regardless of their skill levels. They do not need deep technical expertise to understand its functionality. Its clean and user-friendly interface simplifies complex tasks. Scalability: Kestra is built for horizontal scalability, allowing it to grow seamlessly with demand. Developers can manage everything from simple workflows to complex data pipelines. Its cloud-native architecture scales effortlessly to support millions of executions. Scheduled Triggers: Kestra allows developers to trigger workflows via CRON schedules, messaging queues, API calls, and file system events. This makes it ideal for both time-bound processes and reactive, event-driven architectures. Security: Kestra features role-based access control authentication. You can assign particular permissions to users based on their roles within the organization. Kestra also has an audit logging feature to track user activity and unusual behavior. These security features are suitable for businesses with strict compliance requirements. Use Cases of Kestra ETL/ELT Pipelines: Kestra helps you manage data workflows by pulling data from sources. It can process data and send it to data warehouses. The platform works well with databases like MySQL, BigQuery, and Snowflake. Workflow Automation in DevOps: Developers can use Kestra to automate code testing, set up servers, and launch web applications. In web development, deployment and testing are repetitive tasks. Kesta supports these tasks by orchestrating CI/CD workflows. Running Tasks Based on Events: Kestra initiates workflows in response to events, such as file uploads or incoming messages. In short, the platform can respond to real-time changes. Machine Learning Pipeline Automation: Kestra is well-suited for managing the entire machine learning workflow, from data preparation to model testing and deployment. Checking & Cleaning Data: Kestra helps developers verify that data is accurate and properly formatted before using it for analysis. Conclusion Kestra is an innovative platform that helps you manage complex data workflows. You can integrate it with numerous tools and systems. Its event-driven architecture and low-code approach empower developers and operations teams. If you want to automate your data processes with confidence, consider giving Kestra a try.
Zellij: The Future of Terminal Multiplexing
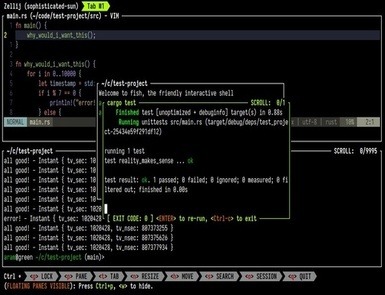
Terminal multiplexing is a technique that helps developers manage several terminal sessions from a single window. Zellij is a powerful terminal multiplexer and is considered a promising alternative to traditional multiplexers. Let us explore why Zellij is gaining a lot of attention from developers. What is Zellij? Zellij is an open-source terminal multiplexer written in Rust. The Zellij-org organization first released it in 2021. Featuring a unique layout system, it brings a fresh perspective to terminal workflows. It lets you split terminal windows and create customizable layouts within a single terminal session. Unlike conventional terminal multiplexers, Zellij features a user-friendly interface and a built-in layout system. It makes it easier for newbies to get started. Some primary features of Zellij are as follows: Key Features of Zellij Plugin System: Zellij plugin architecture offers endless customization opportunities. You can extend it through WebAssembly (WASM) plugins. Zellij allows you to write plugins in any language that complies with WASM. The plugin system lets you extend functionality within the terminal environment. You can also make changes to dashboards and UI widgets. User-Friendly Interface: Zellij features an intuitive interface. Even beginners can quickly navigate through it. Its visual UI Layer improves the platform’s usability. Users can see visible plane borders, tap bars, and a status line. It makes the platform approachable for beginners who have not used keyboard-only interfaces. Users can split, resize, and move between panes without using a keyboard. The default key bindings of Zellij are user-friendly. These shortcuts help you manage panes and work inside your terminal. Built-in Layout System: Zellij comes with a robust built-in layout system. It lets you predefine pane, tab, and command arrangements. It is suitable for creating consistent and repeatable terminal environments. Since the layouts are already defined, you can quickly set up your workspace. Multi-user Collaboration: Real-time collaboration is the core feature of Zelli. You can provide role-based access to your team members without any complex setup. Zellij enables session sharing and parallel collaboration through integrated user permission management. It streamlines processes like team debugging and remote assistance. Highly Secured: Zellij is an excellent terminal multiplexing tool for users who prioritize safety. Written in Rust, Zellij has a well-secured architecture. Its plugins run in a secure sandbox, and configurations are designed with security in mind. Integration: You can integrate Zellij with popular tools. For example, it can work with a container management system to monitor logs in a dedicated pane. Users can also incorporate Zellij with testing frameworks to run parallel tests across multiple panes. Zellij can also be connected to your Git workflow to allocate panes for staging. Mouse Support: Another notable feature of Zellij is its mouse support. Unlike traditional terminal multiplexers that rely exclusively on keyboard shortcuts, Zellij offers intuitive mouse interaction. You can focus panes, switch between tabs, and scroll through terminal output with a few mouse clicks. Additionally, you can resize the pane by dragging. Status Bar: Zellij showcases a status bar at the bottom of the screen. It displays useful information, such as the battery status, the current time, the current status name, and more. Crash-Resistance: Zellij has a built-in crash recovery system. If terminals crash or restart unpredictably, Zellij will restore your last session. It can be a stress reliever and time saver for developers running long processes. UX Features: The terminal multiplexing tool offers numerous unique UX features. For example, it comes with floating and stacked panes. They help users organize and manage panes in the panel. It also has the Command Palette to run commands quickly without complex inputs. Use Cases of Zellij System administrators and developers worldwide use Zellij in various ways. It can manage both single and collaborative sessions. Users can use this platform in the following cases. Project-based Layouts: If you frequently switch between projects, Zellij is a good option. Its project-based layout system supports quick workspace setup. You can begin your session with a predefined configuration. It will set up your directories and panes instantly. Team Collaboration: Zellij can meet your needs if you do pair programming with remote teams. The terminal multiplexer lets you host a shared session and provide permissions to team members. Everyone can see each other’s cursors and panes remotely without using a third-party application. Server Management: Zellij is also an ideal platform for remote server management. You can run it on a remote server and then connect to your Zellij session from your local machine. Live Coding: Instructors who teach coding live can also take advantage of this terminal multiplexer. They can use Zellij to demonstrate coding workflows via collaborative sessions. Conclusion Zellij is a thoughtfully designed terminal workspace that comes with various advanced features. Developers can use it to manage both simple projects and complex remote environments. If you want to level up your workflow, you must give Zellij a try.
Twenty CRM: What Makes it a Leading CRM?

Modern businesses require a dynamic platform to manage customer relationships. While many CRM platforms are available, not all meet growing needs. Twenty CRM is a rapidly growing platform that adapts to diverse business needs. It is also known for its powerful automation capabilities and user-friendly interface. Businesses across various industries are turning to Twenty CRM. Let us explore what sets this platform apart. Overview of Twenty CRM Twenty CRM is an open-source customer relationship management platform founded by Charles Bochet and his team in 2023. The CRM helps businesses track customer interactions and manage sales pipelines. Moreover, it is easy to use and supports team collaboration and scalability. As it is a cloud-based CRM, users can access data from anywhere with an internet connection. The platform is suitable for small, medium, and large-scale businesses. Gradually, Twenty CRM is becoming a popular alternative to conventional CRMs. Let us explore some of its primary features. Features of Twenty CRM Contact Management: Twenty CRM excels in contact management. You can add, edit, filter, and sort customer data effortlessly. The platform lets you maintain detailed records of contacts. It helps you keep your information organized and accessible. This organized approach enables you to foster strong relationships with your clients. Custom Objects and Fields: The CRM enables users to customize fields and objects as per their needs. They can structure the data as per the unique requirements of their businesses. Kanban and Table Views: Twenty CRM supports both Kanban and Table views. Therefore, you can accommodate different user preferences easily. With the Kanban view, you get a visual representation of the workflows. Table view structures your data in a grid format. As a result, you can add, edit, and delete records effortlessly. Pipeline Visualization: Understanding and managing sales pipelines is necessary for developing strategies. The CRM platform comes with customizable pipeline visualization tools. They offer clear insights into each stage of the sales process. You can move deals between different stages using drag-and-drop functionality. Advanced Search bar: Twenty CRM features an advanced search bar. It makes it easier to navigate large datasets. You can find any information using a search query on the search bar. Whether you are looking for a specific contact, note, or deal, you can access it instantly. Task and Activity Tracking: The platform lets you track all your tasks and priorities. You can schedule calls, tasks, and follow-ups with particular contacts. Additionally, you can assign them to your team members with due dates. Email Integration: The CRM platform allows you to integrate with nearly all popular email services, including self-hosted ones. Twenty CRM links emails from known contacts to their respective CRM records. It is crucial to avoid syncing emails from impersonal addresses such as support@ and team@. The CRM automatically logs emails to the appropriate contacts and creates a complete communication history. Automation: Automation is another primary feature of Twenty CRM. You can create workflows that are automatically triggered by specific actions. For example, you can configure CRM to send a follow-up email after a meeting. You can also integrate Twenty CRM with Zapier and Windmill to boost automation. APIs: Twenty CRM provides support for powerful APIs, including GraphQL and REST. GraphQL gives you complete control over data retrieval. It helps you fetch the data you need. REST API allows scalable and flexible data exchange. It uses predictable URLs and standard HTTP methods to integrate with third-party applications and services. Workspaces: Workspaces are self-contained environments within the Twenty CRM. Each workspace may have its own contact list, pipelines, and team members. The feature is valuable for businesses that operate across multiple markets and industries. Each team can use a separate workspace without interfering with others’ pipelines. Customizable Dashboard: The CRM dashboard is customizable. You can display the information that is relevant to your role. Whether you want to monitor sales performance or team activity, the dashboard helps you focus on what matters the most. Twenty CRM Community Support Twenty CRM has a vibrant community of developers and users. You can receive support through the following mediums: In-App Help: The CRM features an in-app help center. It provides access to comprehensive FAQ guides, tutorials, and step-by-step articles. The knowledge base has answers to almost all common questions. Email Support: You can reach their support team via email. You can use this medium for non-urgent yet complex queries. Live Chat Support: If you have a paid plan, access the live chat support. You can share your concerns with an experienced and knowledgeable staff. The response time of this support is generally quick. Onboarding Assistance: If you are a new user, you can seek onboarding support. It includes help with CRM setup and general training. The assistance is very useful while moving to Twenty CRM from another platform. Regular Updates and Feedback: Twenty CRM provides regular updates. Furthermore, it is open to feedback and values users’ opinions. As a result, it helps in meeting real-world requirements. Final Words Twenty CRM has been rising as a leading innovator in CRM software. The platform offers a perfect balance of usability, power, and flexibility. With features like customizable pipelines, email integration, and automation, it is one of the promising CRM platforms. Whether you are a startup or a growing business, Twenty CRM can help you succeed in the current competitive landscape. Give it a try to determine whether it aligns with your requirements.
Why is Web Development So Hard?
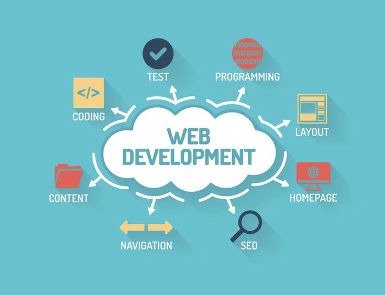
Web development is a creative field with endless career opportunities. However, like every profession, it has some challenges. While the journey of coding and designing may seem straightforward, it has several obstacles. This post explores why web development can be challenging for aspiring developers. Let us begin. Top Challenges in Current Web Development Modern web development has various struggles. Developers balance design, functionality, and performance to deliver an exceptional user experience. Some challenges you may face as an aspiring developer include: 1. Rapidly Evolving Technologies: Web development has advanced significantly over the past decade. Ten years ago, mastering a single programming language was sufficient to build a successful career. Today, developers stay updated with multiple languages, frameworks, and tools to remain competitive. New frameworks and libraries are introduced regularly. Technologies that were cutting-edge a year ago are outdated today. Even well-established frameworks like React, Angular, and Vue continue to evolve. The key to staying relevant is adapting to the ever-evolving web development landscape. 2. Required Broad Range of Skills: Individuals who want to become full-stack developers must master diverse skill sets. They need proficiency in the following technologies: Frontend development (JavaScript, HTML, CSS, UI/UX design, etc.) Backend Technologies (Python, Rust, Node.js, and more) Additionally, understanding DevOps (CI/CD pipelines) is crucial. They cannot overlook various cloud infrastructures and API technologies. 3. The Complexity of Web Development: Websites that look seamless and visually appealing may have complex backends. Managing databases, ensuring responsive design, and optimizing performance is an uphill battle. Remember, website management is an ongoing process. You will frequently clean up codebases and apply security patches to prevent breaches. Without patience, managing these tasks can become a juggling act. 4. Performance Optimization: Website performance optimization is crucial for SEO and user experience. Search engines prioritize websites that load quickly and are responsive. However, it is not as easy as it seems. You will need to perform various optimization tasks. It can range from setting up content delivery networks (CDN) and compressing images to minify web code. 5. Meeting Users’ Expectations: Nowadays, users want more than a fully functional website. They demand a secure, fast-loading site that provides a seamless experience across all devices. Websites with poor UI/UX fail to attract the expected traffic. Therefore, developers keep testing the user experience across various screen sizes. They make sure that the website is compatible with different browsers. As an aspiring developer, you should be ready to experiment to meet user expectations. 6. Security Challenges: With evolving cyber threats, web security has become essential. Handling security issues is not a piece of cake. Nowadays, cross-site scripting, SQL injection, data breaches, and DDoS attacks are primary security concerns. Developers have to implement best practices to safeguard websites against these attacks. They enforce strong authentication and authorization systems and encrypt sensitive information using HTTPS. Additionally, developers perform data sanitization to clean and filter user inputs. These processes help in preventing security vulnerabilities in web applications. 7. Integration of AI: Developers cannot ignore artificial intelligence in the current web development scenario. AI enhances user experience, improves security, and speeds up web development. However, it also comes with some hurdles. Integrating AI-powered chatbots and predictive analytics solutions can be tough. Developers must be proficient in machine learning frameworks and data processing tools. Moreover, they must be aware of different APIs and AI tools. Incorporating AI technologies requires an understanding of ethical AI principles. 8. Soft Skill Requirements: Technical expertise alone is not enough to succeed. Strong interpersonal skills are also essential. A developer must be a problem solver, a team player, and an impressive communicator. As web development projects become more collaborative, these things become important. Final Words Web development demands a strong technical skill set and the ability to keep up with ever-evolving technologies. Without a strong learning mindset and passion, the process can become difficult. We hope the above points help you handle the challenges of web development. If you are struggling to navigate the complexities of web development, I am here to help. At AlmasWebConsulting, I can help you transform complex ideas into a high-performing website. Get in touch if you need web development consulting or assistance.
Hono.js – The Next Generation Web Framework

Speed, simplicity, security and scalability are key foundations of modern web development. However, only a few platforms provide all of them. Hono.js is one of them. It is an advanced framework designed to meet the needs of developers building high-performance web applications and APIs. This post explores Hono.js’s features and determines whether it lives up to its promise. Let’s get started. Overview of Hono.js Hono.js is a cutting-edge web framework that was first released in May 2022. Yusuke Wada is a key person behind its release. He is a renowned Japanese framework developer known for his contributions to open-source projects. Hono.js is a lightweight yet power-packed framework. It functions seamlessly across several JavaScript runtimes, including Bun, Cloudflare Workers, and Deno. Since its inception, this framework has evolved rapidly. The latest version, Hono.js 4.7.4, was released in March 2025. This new version streamlines the development process by offering several features. It’s ultrafast router minimizes the latency, whereas the optimized build makes it well-organized. Web developers who prioritize performance without compromising on flexibility can leverage this framework. Let us explore the key features of Hono.js that make it stand out. Features of Hono.js Excellent Performance and Speed: Hono.js is renowned for its blazing-fast speed and outstanding performance. It’s small size and optimized routing mechanism helps it load quickly. Furthermore, unlike heavier frameworks, it consumes fewer resources. The framework is suitable for apps handling concurrent requests, such as APIs, and real-time applications. Lightweight: The framework is exceptionally lightweight. It does not have unnecessary bloat. You get only the essential features required to build a web application. As a result, it has a small codebase that ensures fast execution times. However, if you need a particular functionality, you can extend the framework accordingly. Straightforward Routing: Hono.js offers a simple yet powerful routing system, making it easy for developers to define endpoints. It uses a trie-based routing mechanism, making it faster than Express.js and other frameworks. Hono.js routing system supports wildcard routes, dynamic parameters, and middlewares chaining. As a result, users can manage complex URL structures easily. They can also develop web pages and APIs with minimal effort. User-Friendly API: Hono.js has a clean API that enables developers to start quickly. Similar to TypeScript and JavaScript, Hono.js provides clean and concise syntax. Built-in Middleware Support: Middlewares are an essential part of web frameworks. It allows developers to define functions that run during the request-response cycle. Hono.js offers built-in middleware support. Developers can add features like authentication, error handling, logging, and more. The middleware architecture is easy to extend. If required, you can add 3rd party modules or even write custom middleware. Support for TypeScript: Many developers prefer to use TypeScript because of its better code maintainability and type safety. Hono.js offers full support for TypeScript. Developers can write strongly typed code that reduces runtime errors and improves maintainability. Multi-runtime Support: Hono.js runs seamlessly on various serverless and cloud environments. Therefore, you can use it for diverse projects. Hono.js enables developers to use the same codebase across different infrastructures with minimal modifications. Use Cases of Hono.js Serverless Applications: Hono.js requires limited resources, which makes it suitable for serverless apps. This framework runs on nearly all major serverless platforms, including Google Cloud and AWS Lambda. API Development: Hono.js is an excellent tool for building a powerful and fast API. The framework lets developers create endpoints quickly. They can handle requests efficiently, thanks to built-in middlewares. Microservices: Hono.js is an ideal platform for building microservices. It can handle small services that interact with other parts of the system. Single-Page Applications: You can also use Hono.js to build single page applications. Its asynchronous capabilities let you handle server-side jobs without creating bottlenecks. Additionally, it allows seamless real-time data fetching. Real-time Apps: Hono.js’s non-blocking and asynchronous nature makes it ideal for real-time applications. You can use this framework to build chat apps, live notifications, and collaborative tools. Conclusion Hono.js is a well-structured modern framework. It offers the flexibility to build scalable web apps and cross-platform mobile apps. With features like built-in middlewares support and a developer-friendly API, it is quickly emerging as the next-generation web framework. For developers looking to stay ahead in web development, Hono.js is a valuable choice.
Tauri: Everything You Need to Know about it

The world of app development is constantly evolving. Developers today need powerful app-building tools to meet growing user demands. They seek technologies that offer all essential features in one place. Tauri is one such platform. In recent years, this open-source framework has gained significant traction among developers. This modern toolkit enables users to build cross-platform applications for both mobile and desktop. Let us explore the features that make Tauri a revolutionary app development platform. What is Tauri? Tauri is a framework that allows users to build apps with CSS, JavaScript, and HTML. It was first introduced in 2020 by Daniel Thompson-Yvetot and Lucas Nogueira. In October 2024, Tauri released its stable version, Tauri 2.0, which introduced significant improvements. The current version, Tauri 2.3.1, was released in February 2025. At its core, Tauri is quite flexible and modular. It has various tools and APIs that let you integrate between front-end and back-end technologies. Over the past few years, the user base of Tauri has grown significantly. Let us examine its key features, which make it so popular. Features of Tauri Lightweight: Tauri is exceptionally lightweight. It uses the native web view of the operating system to render the app UI. Compared to Electron, Tauri has a smaller bundle size. It naturally minimizes memory usage. For example, a simple ‘Hello World’ program built with Electron can occupy up to 100 MB of disk space. However, the same application built with Tauri would take only a few megabytes. This is the primary reason Tauri-based apps load quickly. Cross-Platform Compatibility: Unlike many modern frameworks, Tauri supports both mobile and desktop platforms. Consequently, it has become a top competitor for numerous mobile-first tools, including React Native and Flutter. Tauri lets you develop apps that users can run on all operating systems, including Linux, Windows, and macOS. It also provides a consistent API to interact with the underlying operating system. This flexibility allows developers to focus on the core of the app. They do not need to worry about platform-specific twists. Highly Secured: Tauri does not compromise on security. It provides built-in support for secured storage, automatic updates, and sandboxing. Additionally, you can define specific permissions and command scopes. Tauri safeguards against Front-end compromises and accidental exposure of system interfaces. It also enforces practices like code reviews and signed commits for enhanced safety. Rust-Based Backend: Tauri’s backend is built with Rust, a programming language known for its excellent performance and safety. Rust enables Tauri to handle complex tasks and prevent errors like null pointer dereferencing and buffer overflows. Easy to Customize: Tauri is highly customizable. The framework has a set of APIs and plugins to add various functionalities to an app. You can also build custom plugins in Rust. Mobile Support: Tauri provides native support for iOS and Android. Developers can integrate their application logic with Tauri’s frontend using a mobile plugin system. They can also use the desktop app code on mobile to save time and effort. Permission System: Tauri has replaced the old allowlist method with a new permissions system. It uses Scopes, Abilities, and Permissions to simplify access control. Hot Module Replacement (HMR): The HMR feature in Tauri lets developers update code changes in real-time. They do not need to restart the entire application. It speeds up development automatically. What is New in Tauri V2.3.1? This new version of Tauri focuses primarily on performance and security. A few considerable updates you can notice, include: Dependency Updates: Tauri relies on various libraries and tools, such as Axum, Apple-codesign, Getrandom, and Colored. Tauri has upgraded all of these dependencies to their latest versions. Plugin Enhancements: Many tools used with Tauri have been updated, including Tauri-bundler, Wry, and Tao. Feature Flags: The new version of Tauri has 33 feature flags, allowing developers to customize their applications efficiently. Security: Tauri v2.3.1 has improved security by implementing a secured permissions management system. Top Uses of Tauri Tauri is an excellent platform for building a cross-platform mobile or desktop app. You can use Tauri to make a lightweight app that works on all platforms, including iOS, Android, Windows, macOS, and more. Tauri is an ideal platform for making security-focused applications. After all, it provides you with a sandboxed environment and strict permission controls. Developers who want to write native apps can also use Tauri. Tauri is also suitable for Rust developers who want to use it for GUI apps. It supports integration with system-level APIs. Final Words Tauri is a revolutionary application development platform. Features like cross-platform capabilities, lightweight architecture, and high security make it better than conventional frameworks. The user base of Tauri is growing quickly because of its exciting APIs and tools. If you want to make a powerful native or cross-platform app, Tauri is worth considering.
Docusaurus: Complete Guide to Its Features and Setup

Are you looking for a platform that lets you build documentation websites with minimal effort? If yes, Docusaurus is an excellent choice. The tool is gaining popularity among developers and technical writers because of its powerful features. Let us get to know more about Docusaurus and its impressive features. Overview of Docusaurus Docusaurus is an open-source static site generator developed by Meta. Facebook’s Open Source team first introduced it in 2017. Powered by React, it is an ideal tool for building projects with content, such as posts, guides, and documentation. Let us check out some of its primary features. Compatible with Markdown: Docusaurus provides support for Markdown. It is a markup language that makes text formatting effortless. With its simple syntax, you can easily format your content. Moreover, Markdown files work seamlessly across different platforms. Easy to set up: Setting up Docusaurus is straightforward. With just one command, i.e., npx create-docusaurus@latest [name] [template], you can generate a fully functional documentation website. Supports Customization: Since Docusaurus is built on React, customizing a website is not that difficult. You can add custom React components and adjust the website layouts. Docusaurus also supports third-party plugins that provide additional flexibility. ‘Docs-as-Code’ Approach: The platform follows the docs-as-code approach. It treats documentation like software code. This feature ensures seamless integration and collaboration. Versioning Support: Docusaurus offers built-in support for versioning. It allows teams to maintain multiple versions of their documentation. Therefore, users access relevant information regardless of the version they are using. Localization: With Docusaurus, you can create multilingual documentation. It has a JSON file-based translation system that can manage multiple languages. Furthermore, you can translate your content without any interruption. SEO-Friendly: The platform comes with various built-in SEO features that ensure the visibility of your website in search results. You can create clean URLs that search engines can easily understand. Additionally, it generates static HTML pages that are easy to crawl and index. Algolia Search: Algolia search is another prominent feature of Docusaurus. It allows users to search through their documentation. This search feature delivers relevant search results in real time. You also get a variety of filters to customize the search experience. Extensibility: The plugin architecture of Docusaurus supports extensibility. Using plugins, you can integrate with different analytics tools, search engines, and 3rd party services. Community Support: Docusaurus has a large community of users, ensuring continuous support. If you need help, you can explore the available tutorials and other resources. Use Cases for Docusaurus Product Documentation: If you want to create documentation for your product, Docusaurus can help you. Many companies use it to create comprehensive documentation for their software and hardware devices. Technical Blogs: Docusaurus provides customizable themes and Markdown support, making it easy to create a technical blog. Educational Websites: If you want to create an online course or tutorial-based website, Docusaurus is a good choice. Its Markdown support allows you to create engaging and interactive content with ease. Knowledge Bases: Docusaurus can build both internal and external knowledge bases. With Docusaurus’s built-in search functionality, it is easy to navigate and find information. Getting Started with Docusaurus Set up the Docusaurus project by following the below steps: Download and install Node.js from its official website. Docusaurus needs Node.js to run. Once Node.js is installed, open your terminal and run the command: npx create-docusaurus@latest my-website classic. This command creates a new Docusaurus project in a folder named my-website using the classic template. Navigate to your project folder using cd command (change directory). The command is followed by the name of your project directory. For example, cd my-website. Start the development server by running the command: npm start. It launches your site locally. Customize your website by editing the docusaurus.config.js file. It helps you configure your website settings. You can also modify your Markdown files in the docs folder to add or edit content. Once you have completed all the necessary customizations, deploy your website to a hosting service. You can use Netlify, Vercel, GitHub Pages, or other options depending on your preference. Conclusion Docusaurus is a powerful tool for developing, deploying, and maintaining documentation websites. You can use this versatile tool to build various types of content-based platforms. Whether you want to create a technical blog or a knowledge base, you may want to give Docusaurus a try.
BugHerd Review: The Best Visual Feedback Tool for Website Bug Tracking

BugHerd is a tool that helps users do visual bug tracking and leave feedback. You can use it for a website, web app, and native application. Since the tool supports multi-bug monitoring altogether, it saves time. Let us explore BugHerd’s features and see what makes it better than its competitors. BugHerd Overview BugHerd is an Australia-based start-up founded by Alan Downie and Matt Milosavljevic in 2011. This visual feedback and bug-tracking solution enables developers, designers, and the QA team to identify and resolve website issues. BugHerd simplifies bug identification by letting individuals pin feedback straight onto the live website. It means you can point, click, and write comments on the live elements of a website. In addition to assisting users with bug identification, BugHerd offers valuable insights into operating systems, screen resolution, and more. Features of BugHerd BugHerd aims to overcome the challenges of traditional bug-tracking systems. Primary features you may notice in this tool include: BugHerd allows you to click on any website element and leave suggestions. You can pin your feedback, and the accountable team will take the needed action. BugHerd features a visual task board that organizes all the bugs and feedback in a structured way. Tasks are categorized by status: To Do, Done, and Backlog. Team members can refer to this board to track progress, assign jobs, and manage workflow. The tool supports browser extension and an embedded widget. You can catch feedback and bugs without using external software. BugHerd complies with Chrome, Firefox, and other primary browsers. BugHerd’s bug report comprises complete metadata. It includes information on browser type, screen resolution, URL, and more. Developers use this data to resolve bugs quickly without requiring extra input from users. BugHerd supports centralized feedback management. You get all the feedback in one place. It helps you assign tasks quickly to dedicated team members. BugHerd also allows you to invite numerous clients to give feedback. BugHerd integrates with almost all project management tools. You can incorporate Trello, Jira, Slack, Asana, and GitHub with BugHerd. The platform enables users to record video feedback and take screenshots. This feature helps you explain complex issues that cannot be described with text alone. BugHerd features a mobile-friendly interface. Users can also track bugs and provide feedback on mobile-responsive websites. Who can use BugHerd? BugHerd is a versatile tool that caters to a diverse range of professionals. If you hold any of the following roles, BugHerd can be a great help. Web Developers: Developers can use BugHerd to track bugs in their projects. UX/UI Designers: Website designers can also use BugHerd to receive feedback on interface elements. Project Managers: BugHerd assists managers in managing tasks and supervising the progress of web development projects. QA Team: BugHerd makes bug reporting easy for a QA team. The team can track the process of quality assurance efficiently. Marketing Team: A marketing team can also use BugHerd to ensure brand consistency and review website content. Client: The BugHerd tool is equally beneficial for clients. They can give feedback without requiring technical skills. They can click and comment on a live website. Steps to Use BugHerd Tool Create a BugHerd account. You may also log in using your Microsoft or Google account. After signing up, you can access the BugHerd dashboard. You can download and install the BugHerd extension for Firefox, Chrome, and other browsers. Create a new project and add the website URL you want to track. You can invite your entire team and client to collaborate on the project. Activate BugHerd and pin comments straight onto elements that require changes. Check feedback in the BugHerd task board and assign issues to team members. The team will address reported bugs and update their status. It ensures that all bugs are fixed before closing the tasks. You can check if all issues have been resolved before finalizing the project. Conclusion Whether you are a software tester or developer, BugHerd can be your best companion for tracking and fixing bugs. The tool has numerous features that make bug fixing exceptionally straightforward. Its visual and collaborative design outshines traditional bug trackers. While BugHerd is a paid tool, you can take its free trial to experience its benefits.